
Summary
This page explains how, as a site leader, you will be able to manage all the tables in the database by:
- Making changes to them by inserting new rows and updating and deleting existing rows
- Importing files of data into tables and exporting files of data from tables
- Importing, Inserting and editing queries recorded in the query table
This page assumes that you have read the pages:
- Getting started with Anchurus II
- Using the Anchurus II web application: the basics a site viewer’s view
- Using the Anchurus II web application: site editors’ view
- The Anchurus II release 2 database
Getting started and the control screen
To get started, you login and then select a site. For details of how to do this see the manual page: Using the Anchurus II web application: the basics: a site viewer’s view.
Once you have done this you are presented with the control screen ( Figure 10.1). In the control screen header (the green box), you are presented with:
- A “Select site” dropdown which will give you a list of sites you can access
- Site summary: with a list of tables each with their number of rows
- Your email address
- Your status as a user in this case Site Leader
On the next line, there are:
- Help dropdown that takes you to the Anchurus web site
- List dropdown: listing the names of tables that you can list
- An Insert dropdown: listing the of names of those table where you can insert rows
- An import drop down: which lets you import data into the data tables
- A query drop down: which lets you list, insert and import queries
- An admin drop down – which gives you access to control the user access to your site (for more details see The Administration Manual. To get a copy contact the Anchurus web site contact form)
The bullets in bold highlight the new features you can access as a site leader.
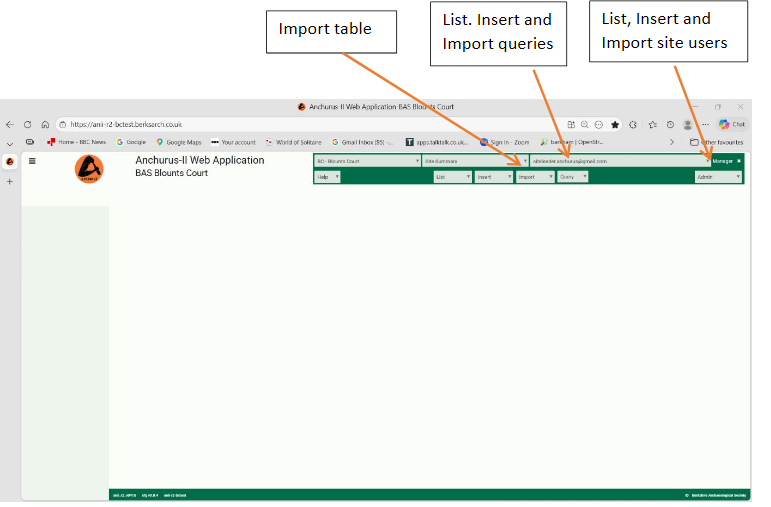
Figure10.1. The Anchurus II site leader’s control screen
you see after you have logged in and selected a site
Listing a table
When you select a table from the List dropdown, you create a new work area, with a work area header and a list of up to the first 10 rows of the table. Once you have selected a row, what you see is shown in figure 10.2 which highlights the new controls you have access to as a site leader. The following sections describe these controls in more detail.
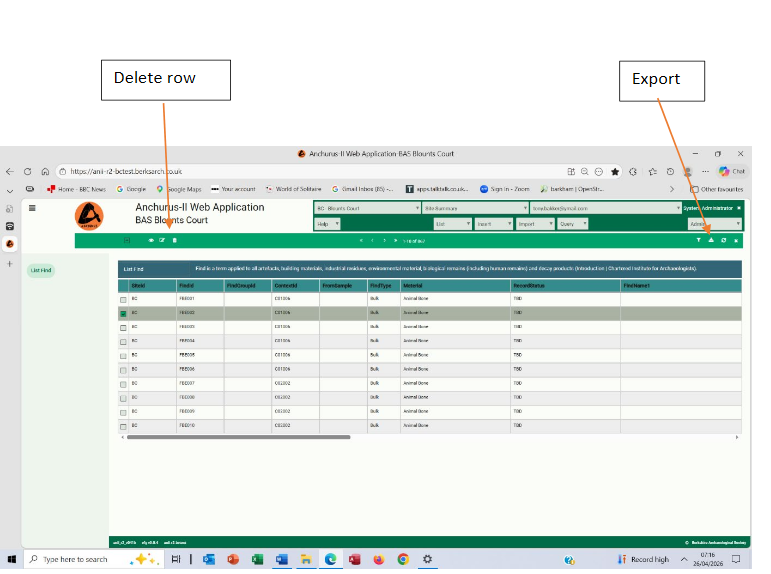
Figure 10.2. A table list seen by a site editor from the find table showing your additional controls as site leader
Deleting rows in a table
Once you have selected one or more rows in a table and you click on delete, you are presented with a popup which asks you to confirm that you wish to delete the row or rows (figure 10.3). When you click on OK, the system makes referential integrity checks (see The Anchurus II release 2 database) and if the checks are satisfied, the rows are deleted.
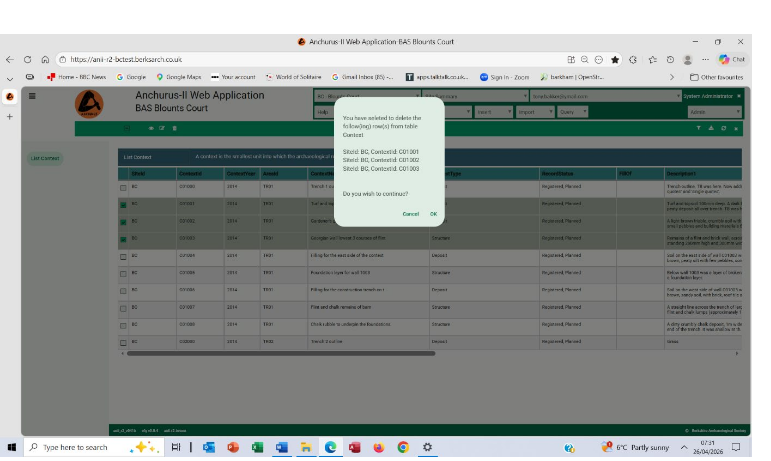
Figure 10.3 The delete row popup
Exporting table data
Once you have listed a table, you can click the export icon where upon a file of data will be downloaded to your downloads folder as a CSV (comma separated variables) file.
This works for the contents of the workspace, so if you are displaying a complete table, a table with filtered columns or the results of a query, export always works.
Importing table data
Clicking on the Import icon takes you to a new work area (figure 10.4) which leads you through the following dialogue.
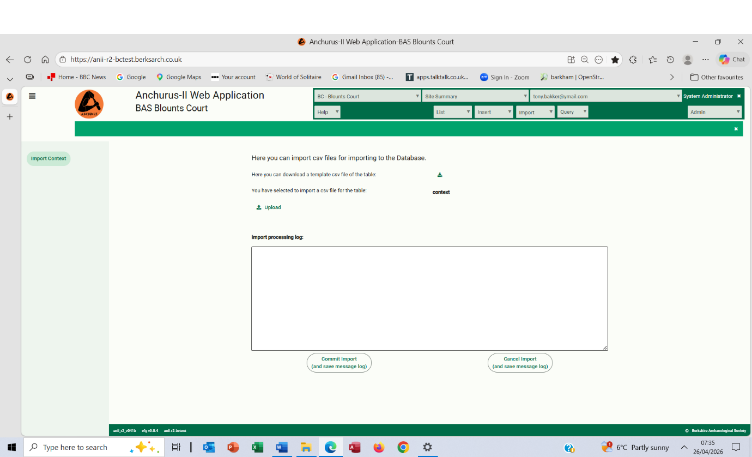
Figure 10.4 The import data work area
Firstly, you are offered the option of downloading an empty CSV (common separated variables) file to record the data you want to import. This file is downloaded into your downloads folder. You can open it with your spreadsheet application where upon you will be presented with a spreadsheet with the top row with the column headings for the table to which you wish to import data (Figure 10.5).

Figure 10.5. The import find table input spreadsheet
Fill the spreadsheet with the data you want to import. Please note, that you should not change the column headings in row 1 of the spreadsheet; if you do, the Anchurus Web application will not be able to import it.
Once you have a complete spreadsheet save it in your filestore either in the site shared drive or in your local computer filestore. Make sure you save it as a .csv format file.
Return to the work area page, and click upload where upon you will be presented with a view of your filestore (Figure 10.6) and select your file.
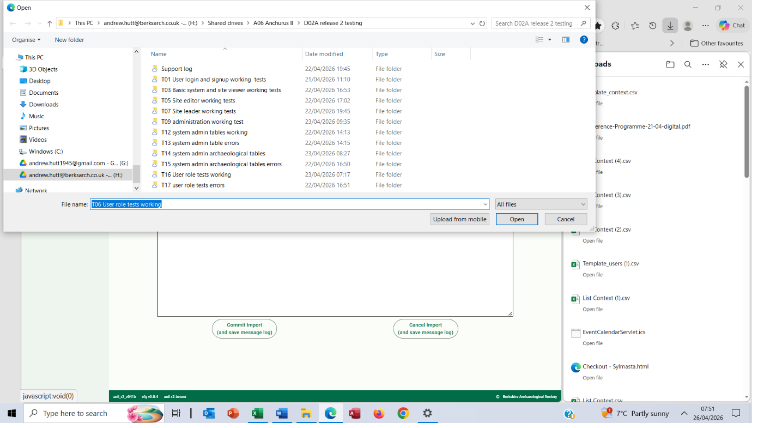
Figure 10.6. Identifying your file in a filestore
The system will upload the data and record the results in the Import processing log (Figure 10.7) This shows for each row of your import spreadsheet (numbered 2 onwards) that it was either loaded successfully or was in error together with details of how you should correct it.
Once all the data has been processed, you are given the option of either abandoning the whole import operation or loading the valid rows. Your choice depends on the level of errors and the difficulty of finding and isolating the rows with errors, correcting them and then reimporting them. In most cases it is best to abandon the import and use the import processing log to correct your data and try again.
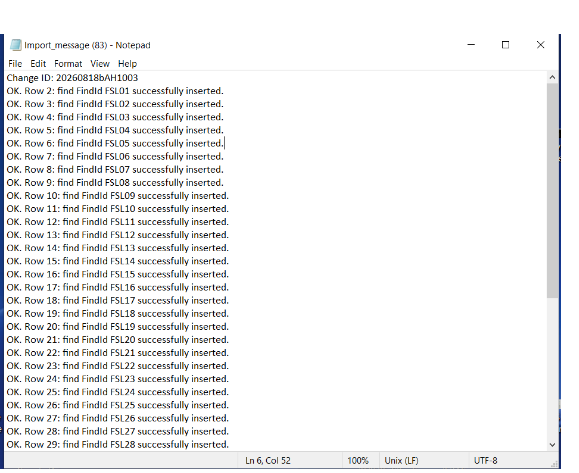
Figure 10.7: The Import processing log when importing 29 rows into the find table
Writing queries
The query table contains a list of all the reusable queries available for your site. You use this table in the same way as all the other tables. You can list the table, view, update and delete table rows and import and export tables rows (see figure 10.8).
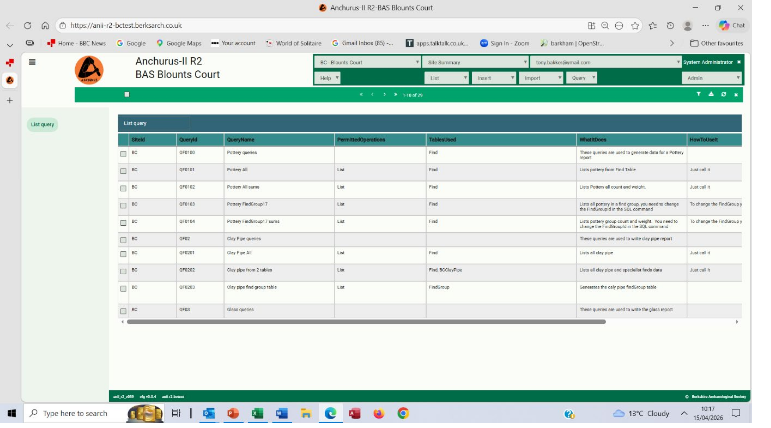
Figure 10.8. A query table list
Your main challenge as a site leader is to write queries using SQL (the Structured Query Language). These are SQL select statements. They have the following parts:
- SELECT keyword followed by
- A list of table column names from one or more tables separated by a new line
- FROM key word followed by either a single table name or a series of Join statements linking the different tables list in 2 above
- If you want a selection of the rows from a table; use a WHERE key word followed by selection statements
- If you want to control the order which the rows are presented in your output, use an
ORDER BY key word followed by ordering clauses
Typical examples of such Selelct statements are:
Example 1 – a simple query
This will select the named columns from rows in the context table for the Site “BC” { Blounts Court}, excavation area “Trench01”.
SELECT
context. SiteId,
context.Contextid,
context.Name1,
context.AreaId
FROM context
WHERE (context SiteId LIKE “BC”) AND (context.AreaId LIKE “Trench01”)
ORDER BY context.ContextId ASC;
Note: the use of newlines and spaces to make the SQL Select statement easier to read.
Example 2 – a complicated multi-table SQL statement
This query compares the dates assigned to a context with the production dates of the finds as recorded in the findgrouup table.
It does this by recording production details from the findgroup table, the find table and the context table.
SELECT
findgroup.SiteId,
findgroup.FindGroupId,
findgroup.Material,
findgroup.FindGroupName,
— comment note the use of AS keyword to rename columns
findgroup.Count,
findgroup.YearStart AS FindGroup_YearStart,
findgroup.YearEnd AS FindGroup_YearEnd,
find.FindId,
find.FindName1,
find.YearStart AS Find_YearStart,
find.YearEnd AS Find_YearEnd,
context.ContextId,
context.YearStart AS Context_YearStart,
context.YearEnd AS Context_YearEnd
FROM ((findgroup
INNER JOIN find ON findgroup.FindGroupId = find.FindGroupId)
INNER JOIN context ON find.ContextId = context.Contextid)
ORDER BY context.ContextId ASC;
Learning SQL
The simplest way of learning SQL is to click on https://www.w3schools.com/SQL/
There are any sites that will validate your SQL statements. Try: Online SQL Validator & SQL Syntax Checker | Free SQL Query Validator.
You can use comments in an SQL statement to clarify your query or to comment out lines while you are testing it (see SQL Comments).
Andrew Hutt and Tony Bakker
Version v02
19/8/2026